
Creating a Frame For Beginners, A Step-By-Step Tutorial.
This is a step by step, instructional post on how to create a frame for a wire wrapped piece of jewelry. This frame will have a built in bail, and will specifically be used to set a cabochon (flat-backed stone).
I would like to give a brief explanation as to why we use frames, and then teach you how to create a frame using a design that I drew.
Why Frame?
Creating frames is something I started doing about four months into wire wrapping and I have not looked back.
A good frame should:
Have enough space to tie-off components
Be roughly the same shape as your design
Have a built in bail (or somewhere to tie off a bail component)
Frames will serve as the bottom layer of a piece upon which you build. You will be able to follow the basic shapes of your frame and create an appealing flow by adding components and layers one at a time.
Frames allow you to erase. If you create a component to add to a piece and it doesn’t flow properly, is too big, too small, or just doesn’t work for some reason, you can remove it from the frame and try again.
Let’s get into the actual process of creating a frame.
What wire is good for frames? We are going to use half-hard, 19 gauge, square wire for framing. The square shape makes it easy to attach components to. The gauge is thick enough to make a sturdy piece without being unnecessarily large. Most importantly, the half-hard component will prevent the frame from twisting or warping when you attempt to add components.

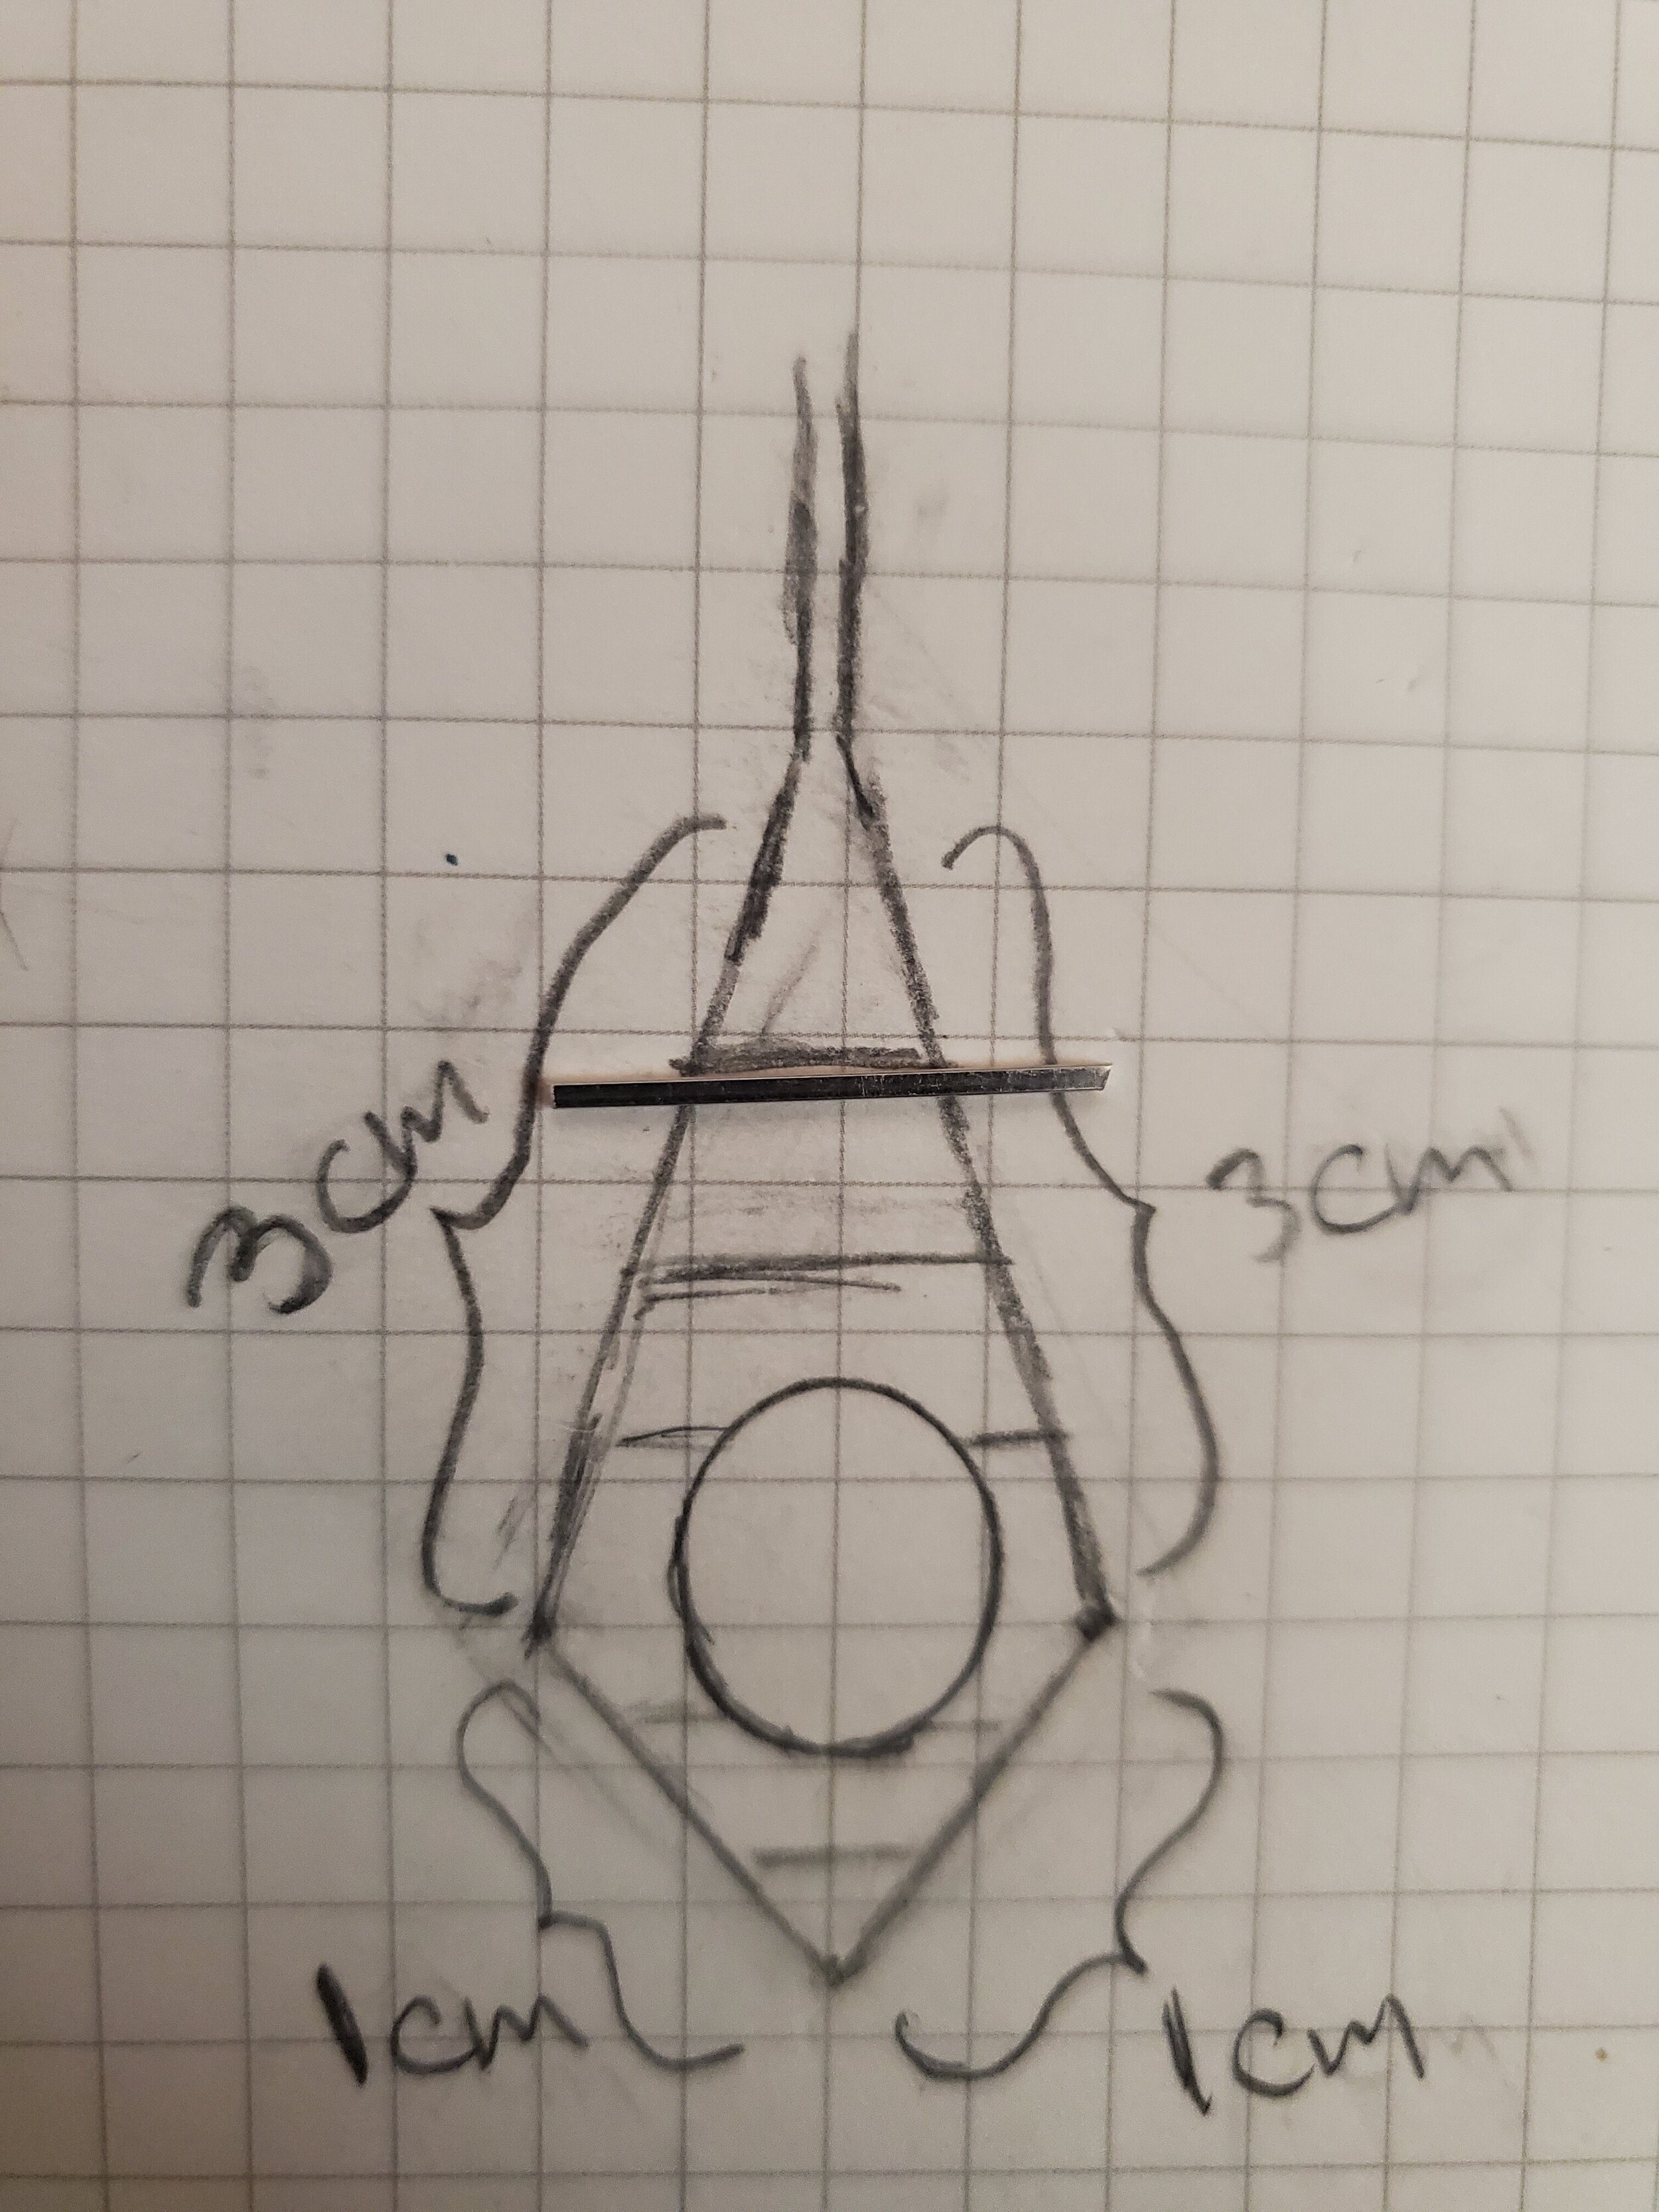
Start with a design
I am providing this diamond frame design for free, as a tool to learn and spark your own creativity! I encourage you to sell, gift, or keep the piece you create with this frame.
If you wish to learn more about designing your own piece, check out our post on designing a piece here.

In this instance, I measured the dimensions of the design to know the exact amount of wire needed (we’re doing this since the frame will be all hard angles, it’s easy to measure straight lines!).
The perimeter is 8cm + 3 cm (for the bail). In total, I cut 11cm of framing wire.
You can keep your wire on the spool to reduce waste (useful for more complex designs).
You can also visually estimate how much you’ll need (this will be easier with more experience).

Now straighten your wire (with nylon jaw pliers or your fingers).
Lay it down over one side of your sketch with additional wire at the top (this will become a bail later).

Make the first bend in the wire at the same point as in the sketch. Start with a small bend, and then decrease the angle until it matches the sketch.

Repeat the previous step at the bottom of the diamond.
Lay your in-progress frame above your sketch, find the point where the next angle is with your pliers, and bend to match the angle in the sketch.

Repeat once more with the right side of the diamond.
You should now have a frame in the shape of a diamond that looks like this.

At the top of the frame where the wires meet; bend both wires so they run north and south, parallel to one another (These will later become a bail).
The next step is to add crossbars.
Cut a length of framing wire that is slightly wider than the width of the top of the frame.

Using your needle nose pliers, attach the crossbar on both the left and right side of the frame.
I attach my crossbar from underneath the frame and wrap it over the side and around the top. This makes the crossbar sit slightly underneath the diamond.
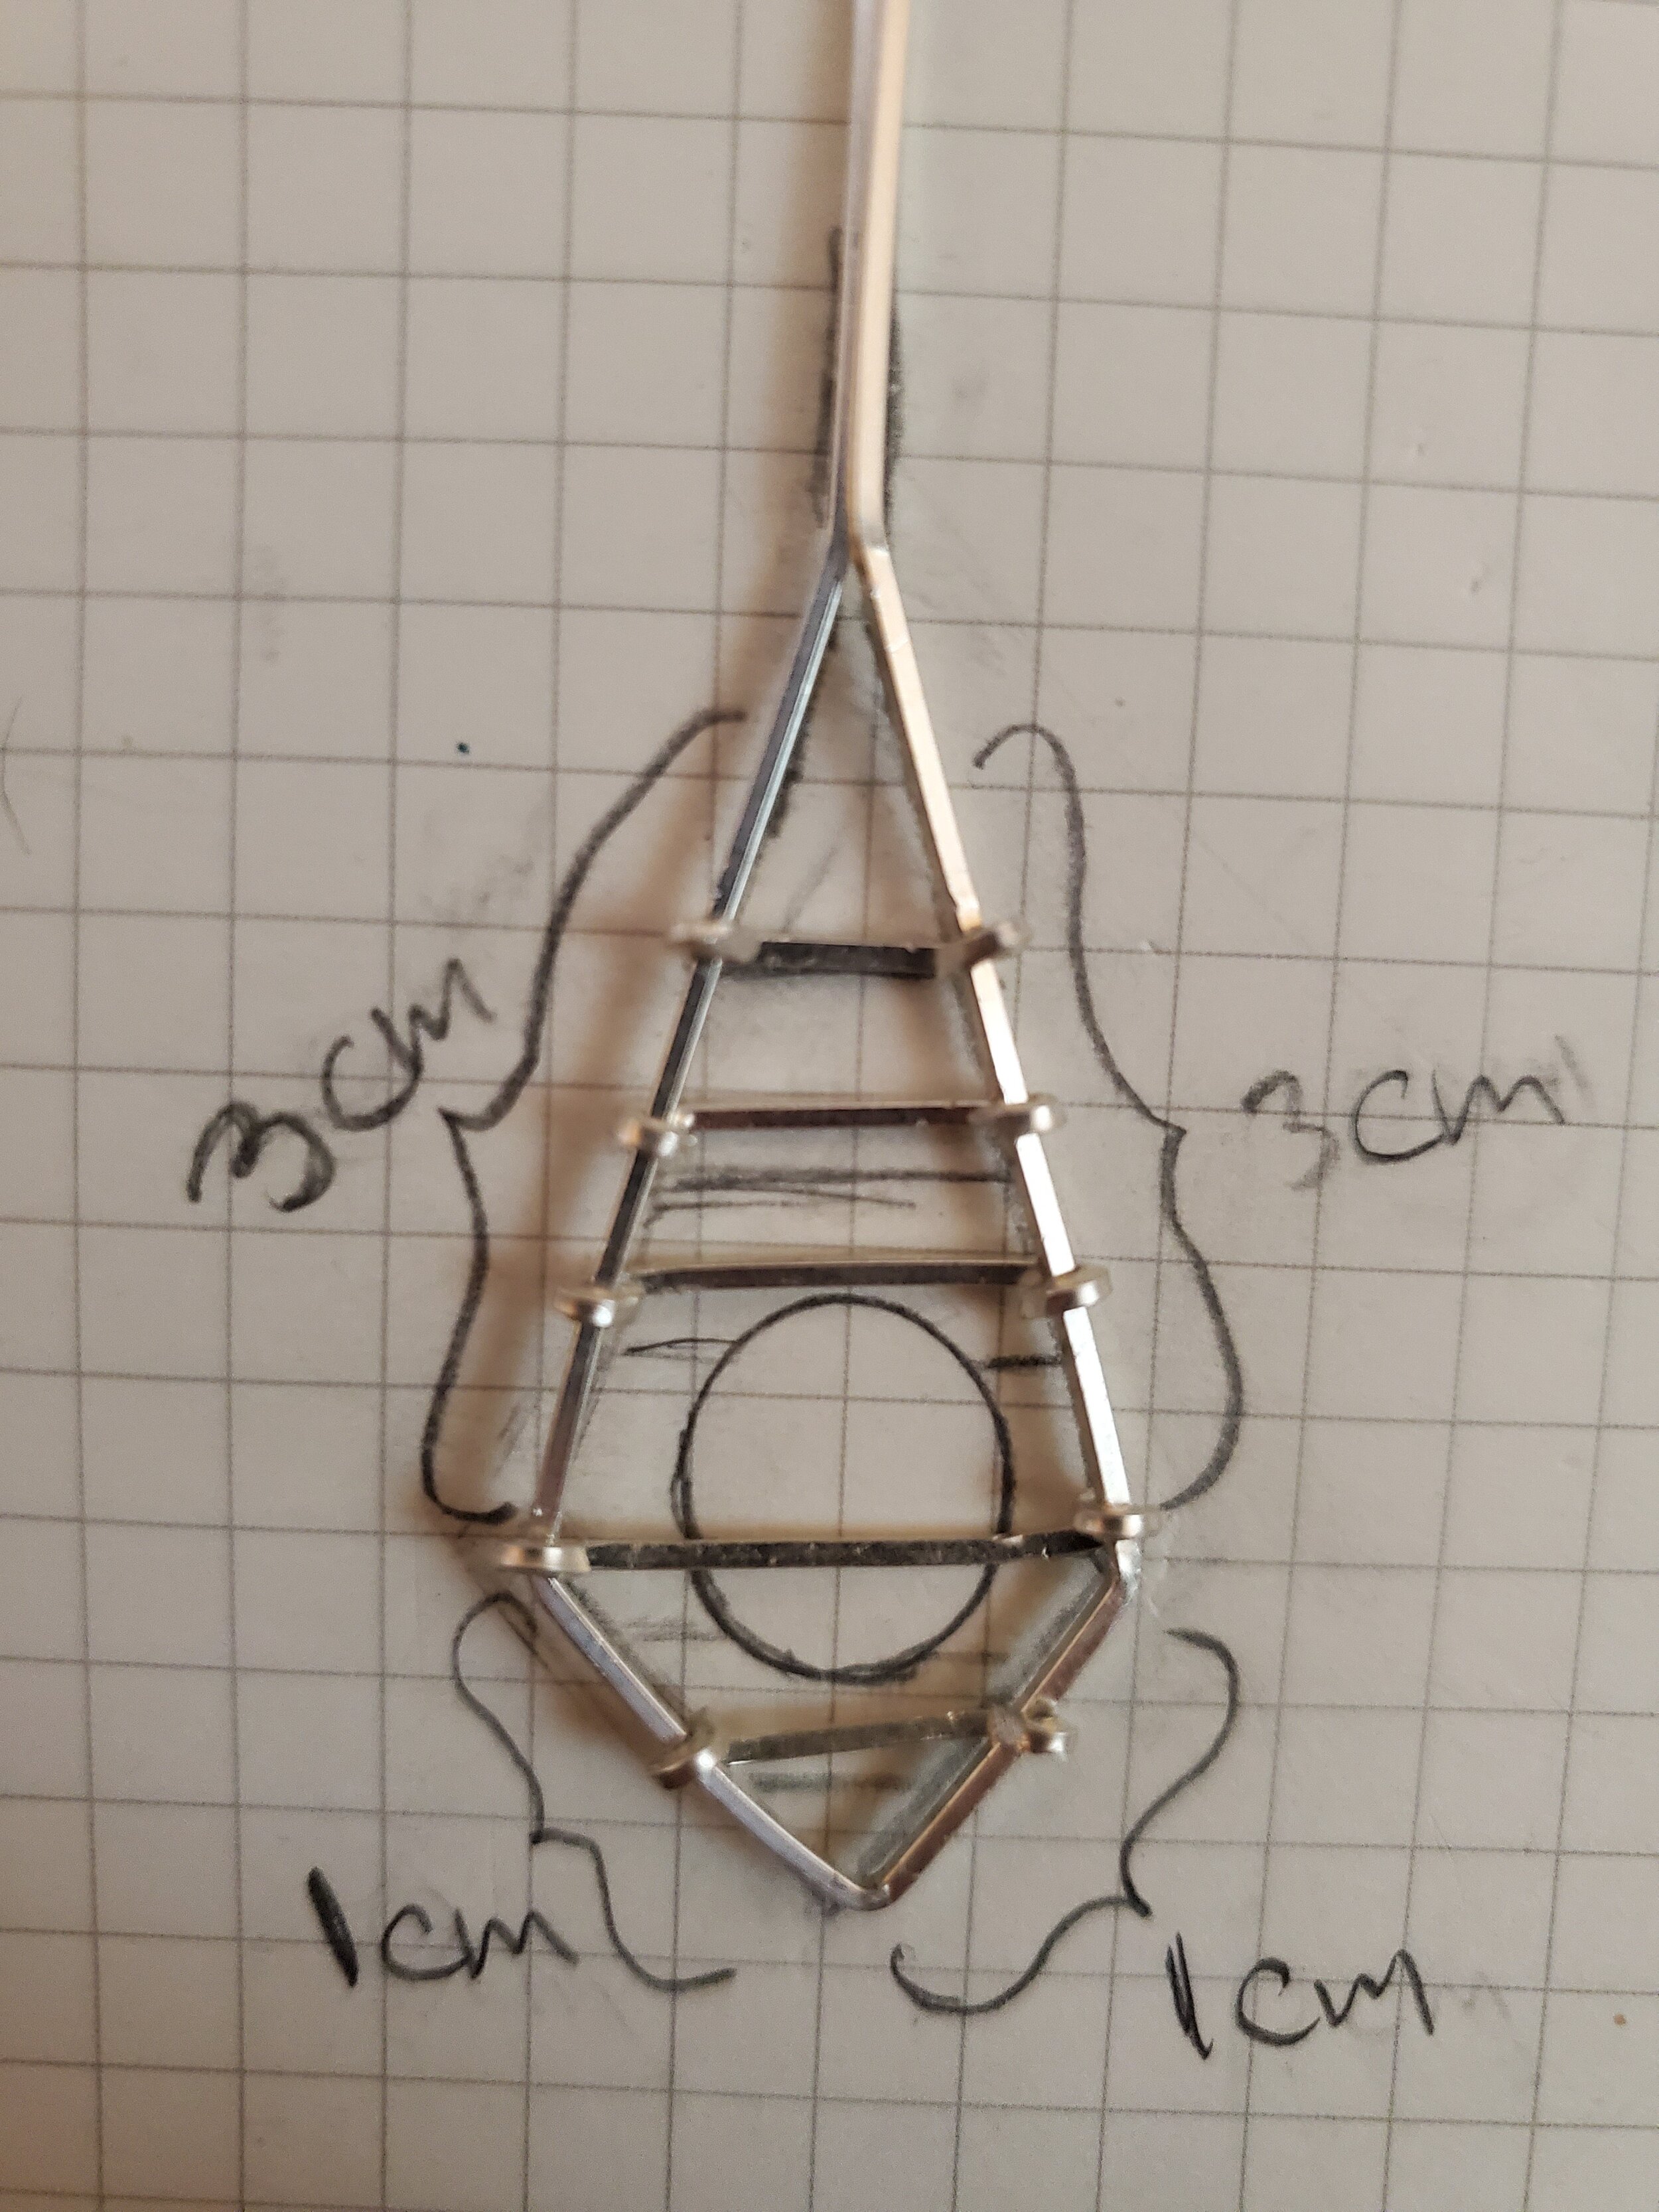
Repeat the previous step four more times, leaving a little bit of space in between each of the crossbars.

Make note of the distance between the middle two crossbars. This is where your cabochon will sit.
You want the bars to sit underneath the cab towards the top and bottom, not too close, otherwise it will be difficult to secure your cab.
You should take your mineral choice into consideration. If using a translucent stone, you want to be able to see through it! Try not to have multiple crossbars running across the center of your stone.
There you have it, your frame is completed! You have crossbars that will hold your cabochon, as well as crossbars to use for tie-off room. You can also use the perimeter of the frame for tie-off room as you see fit. If you followed along up to this point, your frame will still have extra wire at the top. Click here to be taken over to our tutorial on how to turn those wires into a bail.